Hello all and welcome back to the Excel Tip of the Week! This week we are taking a fresh look at the date-gap calculating DATEDIF function – and also examining its flaws and some alternative options.
We last covered the function back in TOTW #265.
What is the deal with DATEDIF exactly?
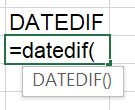
If you go to type DATEDIF in Excel, you might think that no such function exists:

The tooltip seems to think it doesn’t, at least – and it doesn’t appear in Excel’s Formulas libraries – neither in Date & Time nor in Compatibility. But type an open bracket and you can see that there is something going on:

Random text that isn’t the name of any function doesn’t display the tooltip like this – so the function clearly does exist, although we aren’t getting any help from Excel writing it or any acknowledgement that it even exists! All of this is because the function has been grandfathered in from Lotus 1-2-3 (as have quite a lot of Excel functions) – but unlike those others, the function is now deprecated and not recommended for many cases. Microsoft includes the code for it to prevent spreadsheets using it breaking, but doesn’t maintain or acknowledge it in most cases. We’re going to look at how to use it and how to work without it.
How to write a DATEDIF
The syntax is:
=DATEDIF(start date, end date, mode)
Start date and end date are simple and self-explanatory enough – they are the cells or date values that mark the beginning and end of the period we are examining. Mode is a bit different – it has to be one of six in-built text codes (that is, entered with “” speech marks around them) that indicate what kind of difference we’re looking to calculate. We’re going to look at each option in turn and also look at how to do the same thing without using DATEDIF.
D
This option calculates the number of days between two dates:

This is the simplest to replace with Excel functions – you can do either of these:
=DAYS(end date, start date)
=end date – start date
M
This computes the number of complete months in the period.

This one is significantly harder to replicate with other Excel functions, but it’s still doable:
=(YEAR(end date)-YEAR(start date))*12+(MONTH(end date)-MONTH(start date))-IF(DAY(end date)>=DAY(start date),0,1)
Y
Finally for the one-letter options, we have the number of complete years.

This is another tricky one to replicate with other Excel functions:
=YEAR(end date)-YEAR(start date)-IF(DATE(YEAR(start date),MONTH(end date),DAY(end date))>=start date,0,1)
YM
This compound mode computes how many complete months there are between the start date and end date, ignoring the years.

So here, we see that there is just over a month between the 18 June and 3 of August, so we get a 1 – ignoring the years. In regular Excel:
=MOD(MONTH(end date)-MONTH(start date)-IF(DAY(end date)<DAY(start date),1,0), 12)
YD
This mode computes how many days there are between the two dates, ignoring the years.

This shows that there are 46 days between the 18 June and 3 August, again ignoring the years. And the Excel version:
=MOD(end date-DATE(YEAR(end date),MONTH(start date),DAY(start date)),365)
This may differ based on leap days – an exact version could be made but would be much longer!
MD
This is the real problem child of DATEDIF. In theory, it computes the number of days between the start and end dates, ignoring the months and years. However it is known to be bugged and can return 0 values or incorrect values – and there are no plans to fix it.

And the full Excel version:
=end date-DATE(YEAR(end date),MONTH(end date)-IF(DAY(end date)<DAY(start date),1,0),DAY(start date))
You can see all these computations – in both DATEDIF and Excel versions – in this accompanying file.
Join the Excel Community
Do you use Excel in your organisation? Are you using it to its maximum potential? Develop your skills and minimise spreadsheet risk with our Excel resources. Membership is open to everyone - non ICAEW members are also welcome to join.

Archive and Knowledge Base
This archive of Excel Community content from the ION platform will allow you to read the content of the articles but the functionality on the pages is limited. The ION search box, tags and navigation buttons on the archived pages will not work. Pages will load more slowly than a live website. You may be able to follow links to other articles but if this does not work, please return to the archive search. You can also search our Knowledge Base for access to all articles, new and archived, organised by topic.

