
Hello all and welcome back to the Excel Tip of the Week! This week, we have a Developer post in which we’re making a comprehensive review of the various controls which you can use to drive your Excel spreadsheets – from Form controls to ActiveX controls, and a few other pieces besides.
This was last discussed in TOTW #269.
Basic form controls
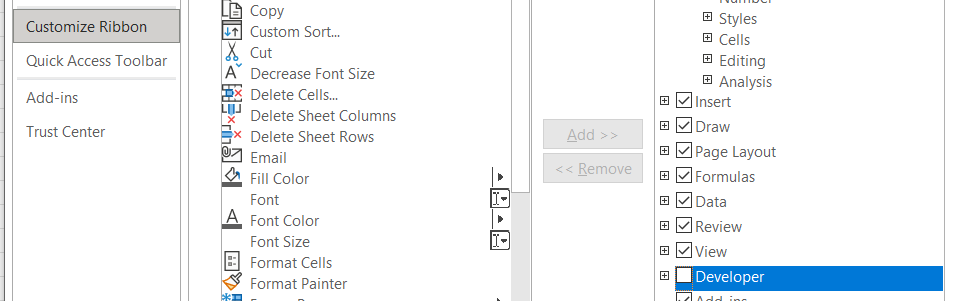
The general idea of controls is to add objects to your spreadsheet which allow the user to manipulate the values of one or more cells more easily and intuitively. These are essentially like levers and buttons that the user can interact with. However, as they are closely tied to VBA and macros, these controls are hidden away on the “Developer” tab of the Ribbon, which is hidden by default. You can enable this from Excel Options => Customize Ribbon:
In general, you add form controls from this menu, and then draw or click to show where to create the associated object:

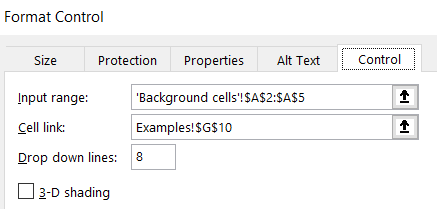
Once the object has been created, you can then right click it to access the associated “format control” menu, which will let you set exactly how it works:
So let’s look at the basic Form controls options:
Button

A button runs an associated macro. Of course these need to be placed in .xlsm files for the macro to be saved. You can set the button text to whatever you choose.
Combo box

These are a slightly different version of the “Data validation => List” way of doing dropdown menus. The main difference is that the dropdown button is always visible, as the dropdown is in a floating object rather than tied into a specific cell. Combo boxes output a number into a linked cell, which corresponds to the position of the selected item. They are useful for any kind of open choice. See below for some more advanced dropdown menu approaches.
Check box

These simple check boxes will flip the value of the linked cell between TRUE and FALSE. They’re useful for driving any kind of simple optionality in your spreadsheet.
Spin button

These buttons can be used to quickly change a numeric value. You can set a minimum and maximum value, plus the size of the increment, from the Format control menu. Spin buttons are useful for quick amendments to key input values. However note that spin buttons don’t permit negative values – if you need them, use the spin button to drive an intermediate cell, and then subtract the appropriate value from that to use as the input.
Scroll bar

These are essentially identical to spin buttons in terms of what they let you do, but have a different form factor.
Option buttons

These allow the user to select one from a series of options, similarly to a Combo box, but with a more visual format. Like a Combo box, the output in the linked cell is a number indicating which option has been selected.
By default, only one option button can be chosen on each sheet. To make separate groups of option buttons that work independently, a second type of form control is needed – a Group box. That is the line you see around each group in the image above.
Further work
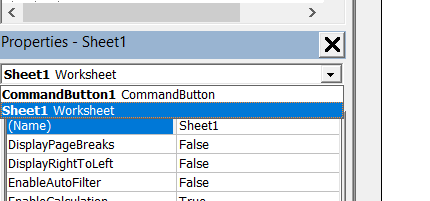
On the same Insert menu, as well as Form controls, there are also options for ActiveX controls. These are mostly similar to the Form controls, but with slightly different appearances and functionality. The main difference from a user perspective is that ActiveX controls can’t be simply set using a right click menu – instead, you have to set “Design mode” to active and then open up the Visual Basic window to find them:
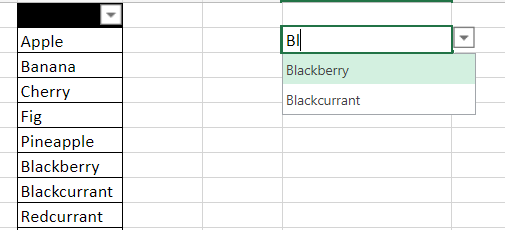
This makes ActiveX controls much more fiddly to use for the most part. But there is one that is worth highlighting – the ActiveX version of a Combo box:
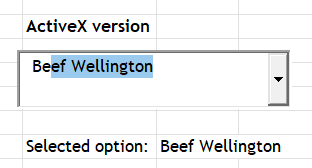
There are two key differences – the selected option is shown directly in the linked cell, rather than just its position number, and (as you can see in the screenshot), these support autocomplete as the user types. This makes ActiveX Combo boxes particularly handy for longer lists of items.
When creating one, the particular options you need to find in the Visual Basic window are ‘LinkedCell’ for the output cell, and ‘ListFillRange’ for the source list of options:

And one final thing – in Excel Online (and currently only in that version), you can also get autocomplete – with just regular Data Validation dropdowns:
You can take a look at the examples shown above (except the Excel Online one) in the accompanying workbook.
Excel community
This article is brought to you by the Excel Community where you can find additional extended articles and webinar recordings on a variety of Excel related topics. In addition to live training events, Excel Community members have access to a full suite of online training modules from Excel with Business.

Archive and Knowledge Base
This archive of Excel Community content from the ION platform will allow you to read the content of the articles but the functionality on the pages is limited. The ION search box, tags and navigation buttons on the archived pages will not work. Pages will load more slowly than a live website. You may be able to follow links to other articles but if this does not work, please return to the archive search. You can also search our Knowledge Base for access to all articles, new and archived, organised by topic.
