Hello all and welcome back to the Excel Tip of the Week! This week we have a General User level post in which we are taking a fresh look at the handy Flash fill data reformatting tool. This was first covered back in TOTW #124.
What does Flash fill do?
Flash fill is an AI-driven tool in Excel that can help complete simple data transformations. It takes an example of new, transformed data from you, and attempts to apply the same pattern to the rest of a column of data. Let’s take this example of phone numbers:
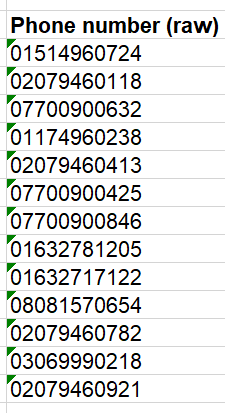
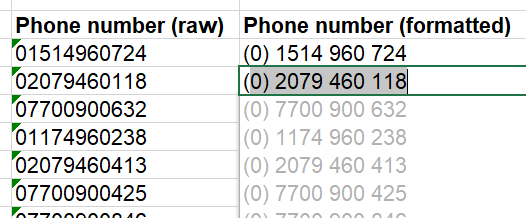

Note the little menu icon which has now appeared – you can use this to undo the Flash fill, or to highlight which cells it generated vs. those which you typed manually.
If Flash fill’s suggestion don’t automatically appear for you, try using Ctrl E or selecting the option from Home => Fill.
How can you do more with Flash fill?
Flash fill is based on AI, so it isn’t perfect – but it does do pretty well at figuring out patterns. One nice feature is that, if the pattern that Flash fill tries isn’t quite right, you can correct it line by line and, as you go, it will update and try to find the right pattern.
Let’s take this list of names and titles as our example:
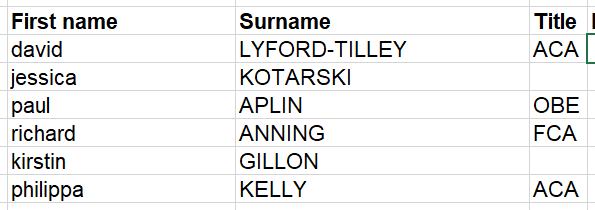
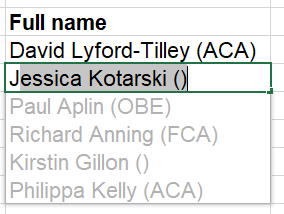


Now we are sorted. The real strength of Flash fill is easily performing simple data transformations at speed. But it does have some weaknesses.
The main issue is that Flash fill is an opaque process – once you have stopped making tweaks to the data and moved on, there’s nothing left in the file to either note that you used Flash fill, or what exactly it did. This means it’s easy to miss a mistake, and hard to apply a correctly-working Flash fill to new data.
There is one similar function that’s worth investigating if you want the ease of Flash fill without these issues – loading the data into Power Query, and using “Column from Examples”. This feature similarly uses AI to try and figure out what you want, and similarly can be modified by providing more examples, but it creates an explicit and re-usable PQ transformation step at the end, making reviewing and re-using much easier. It’s not foolproof – I couldn’t get it to figure out the name pattern, for example – but it’s worth looking in to.
Take a look at all the examples and try them yourself in the attached file.
Join the Excel Community
Do you use Excel in your organisation? Are you using it to its maximum potential? Develop your skills and minimise spreadsheet risk with our Excel resources. Membership is open to everyone - non ICAEW members are also welcome to join.

Archive and Knowledge Base
This archive of Excel Community content from the ION platform will allow you to read the content of the articles but the functionality on the pages is limited. The ION search box, tags and navigation buttons on the archived pages will not work. Pages will load more slowly than a live website. You may be able to follow links to other articles but if this does not work, please return to the archive search. You can also search our Knowledge Base for access to all articles, new and archived, organised by topic.

