Hello all and welcome back to the Excel Tip of the Week! This week, we have a Creator level post in which we are reviewing where you can add passwords to Excel – and which are strong and which are weak. This was last discussed in TOTW #216.
Excel password security
There are several places that you can add passwords to Excel – but not all of them are created equal. Some passwords are extremely secure and can be relied upon to protect your data. Others can be removed in minutes using tools easily downloaded from the web. So it’s important to know which is which!
Let’s start with the high-security options. An important note is that there is no password recovery for these; if you lose your password, you will lose your work.
To open the workbook
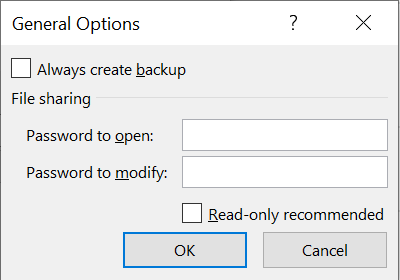
This box can be accessed while saving the file using the Windows Explorer interface, by clicking Tools => General options. It’s pretty well hidden! But setting a password here will lock and encrypt your data so that it cannot be opened without the password.
Note that earlier versions of Excel were vulnerable to methods which could remove a password; however anything from version 2010 or later will be highly secure if a strong password is used. So a long password with a large character set, and not based on guessable personal details.
To enter a VBA project
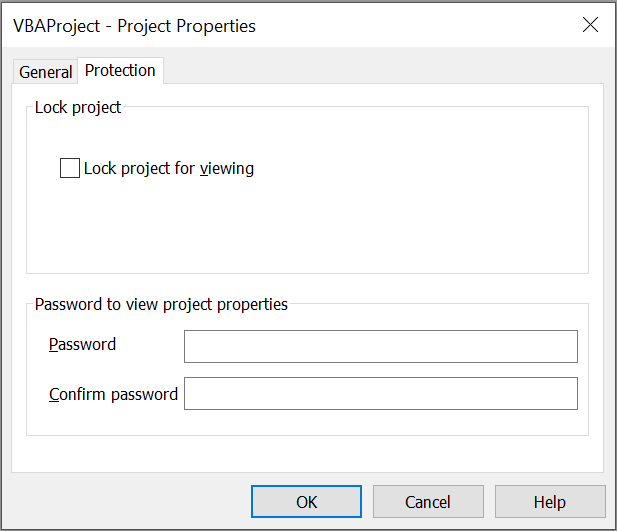
This can be accessed while in the VBA editor from right click => VBA project properties; however annoyingly you will need to fully close and restart Excel for it to take effect.
The password allows the code to run, but will prevent users from opening the project to view or amend it.
Other places you can set a password
All other Excel passwords are vulnerable to various hacks and exploits that can remove them – so you should treat them like a velvet rope – there to indicate that an area of the spreadsheet isn’t to be entered, but not actually going to keep anybody out if they really want to get in.
To make changes
On the same menu as adding a password to open the file (see above), you can also see the option to add a password that is needed to modify the file. While these passwords are secure, if the user can open the file without it, then it’s possible to copy all the data out.
To alter a specific worksheet
You can protect an individual worksheet by either right clicking on it and selecting Protect Sheet, or from Home => Format => Protect Sheet. There’s a long list of options of what will and won’t be protected:
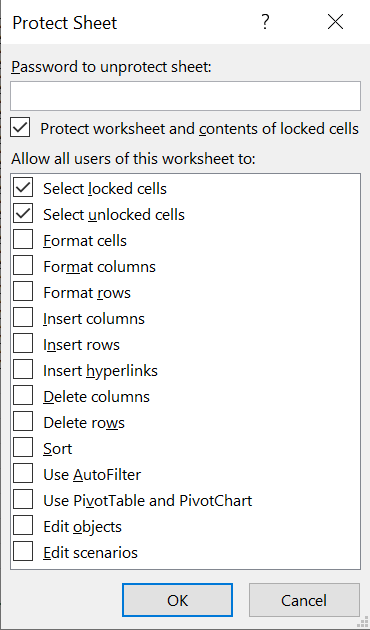
The “locked” and “unlocked” cells at the top here refer to a formatting setting that each cell has – “locked” cells become uneditable when the sheet is protected, while “unlocked” cells do not. Every cell is locked by default and you can change from Home => Format => Lock cells.
To prevent unsharing or turning off track changes
This one is on the Review ribbon in older versions where file sharing was based on sharing from public file directories:

Rather a niche one here, but you can also exert a little control over what people you are sharing your workbook can do with it, such as turning off the sharing option or switching off track changes if you have enabled it.
To edit specific ranges in a shared workbook
This one has remained in later versions, under Review => Allow Users to Edit Ranges:
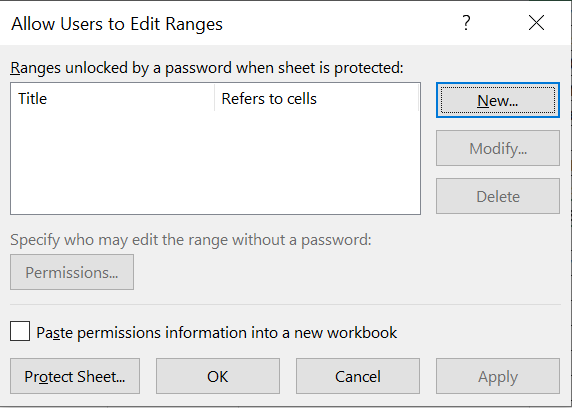
In combination with the earlier sheet protection, you can use this to grant specific people the permission to edit ranges. This isn’t an area where you can add a password so much as a specific exemption to a password that you can grant.
To move tabs, close windows, or otherwise change the workbook’s structure
This option isn’t very clearly named, being listed under Review => Protect Workbook:
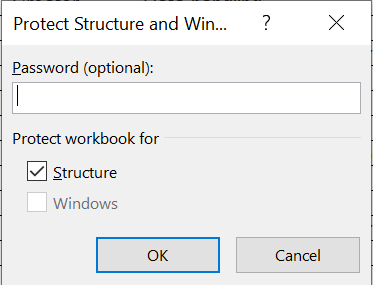
The tickboxes here also are a bit opaque. Protecting the workbook structure prevents users from adding, deleting, or reordering the worksheets in the file. If you have created a second view window from View => New window, then ticking ‘windows’ will prevent users from getting rid of it.
There are many places you can add password protection to your worksheet – but it’s important to be clear about exactly what each accomplishes, and which are and which are not reliably secure. Think about it next time you want to keep Excel data secure.
Excel community
This article is brought to you by the Excel Community where you can find additional extended articles and webinar recordings on a variety of Excel related topics. In addition to live training events, Excel Community members have access to a full suite of online training modules from Excel with Business.

Archive and Knowledge Base
This archive of Excel Community content from the ION platform will allow you to read the content of the articles but the functionality on the pages is limited. The ION search box, tags and navigation buttons on the archived pages will not work. Pages will load more slowly than a live website. You may be able to follow links to other articles but if this does not work, please return to the archive search. You can also search our Knowledge Base for access to all articles, new and archived, organised by topic.

