
Although you can accomplish a great deal in Power Query by just using the editor interface, knowing how the underlying formula lines work, and being able to edit and create formula lines directly, can help you achieve even more. Having looked at making simple changes to existing formula lines in the last episode, this time we are going to see how to add a new line that displays a due date by adding a calculated column to a table.
Introduction
Having looked in recent years at all sorts of ways in which Power Query can automate the manual and solve the insoluble, in this series we are delving a little deeper into how Power Query works to show how it can be made to do even more.
As we have seen in the previous parts of the series, it is important to make sure that the Formula Bar is visible in the Power Query editor. If you can’t see the Formula Bar, you can turn it on using the option in the View Ribbon tab.
Adding a column
Perhaps the most common action that allows us to create a new formula line is adding a column to an existing table. The editor devotes an entire ribbon tab to the various Add Column commands. Many of these commands allow you to create your new column just be making selections from the interface. For example, there is a Duplicate Column command to create a copy of a column that you can then transform without losing the contents of the original column; an Index Column command that adds a sequential index number to each row of the table and the Column From Examples command that creates a column from a formula that Power Query works out from examples that you enter. However, we want to create our formula from scratch so we will use the Custom Column command. This opens a dialog with a text box in which to type our formula:
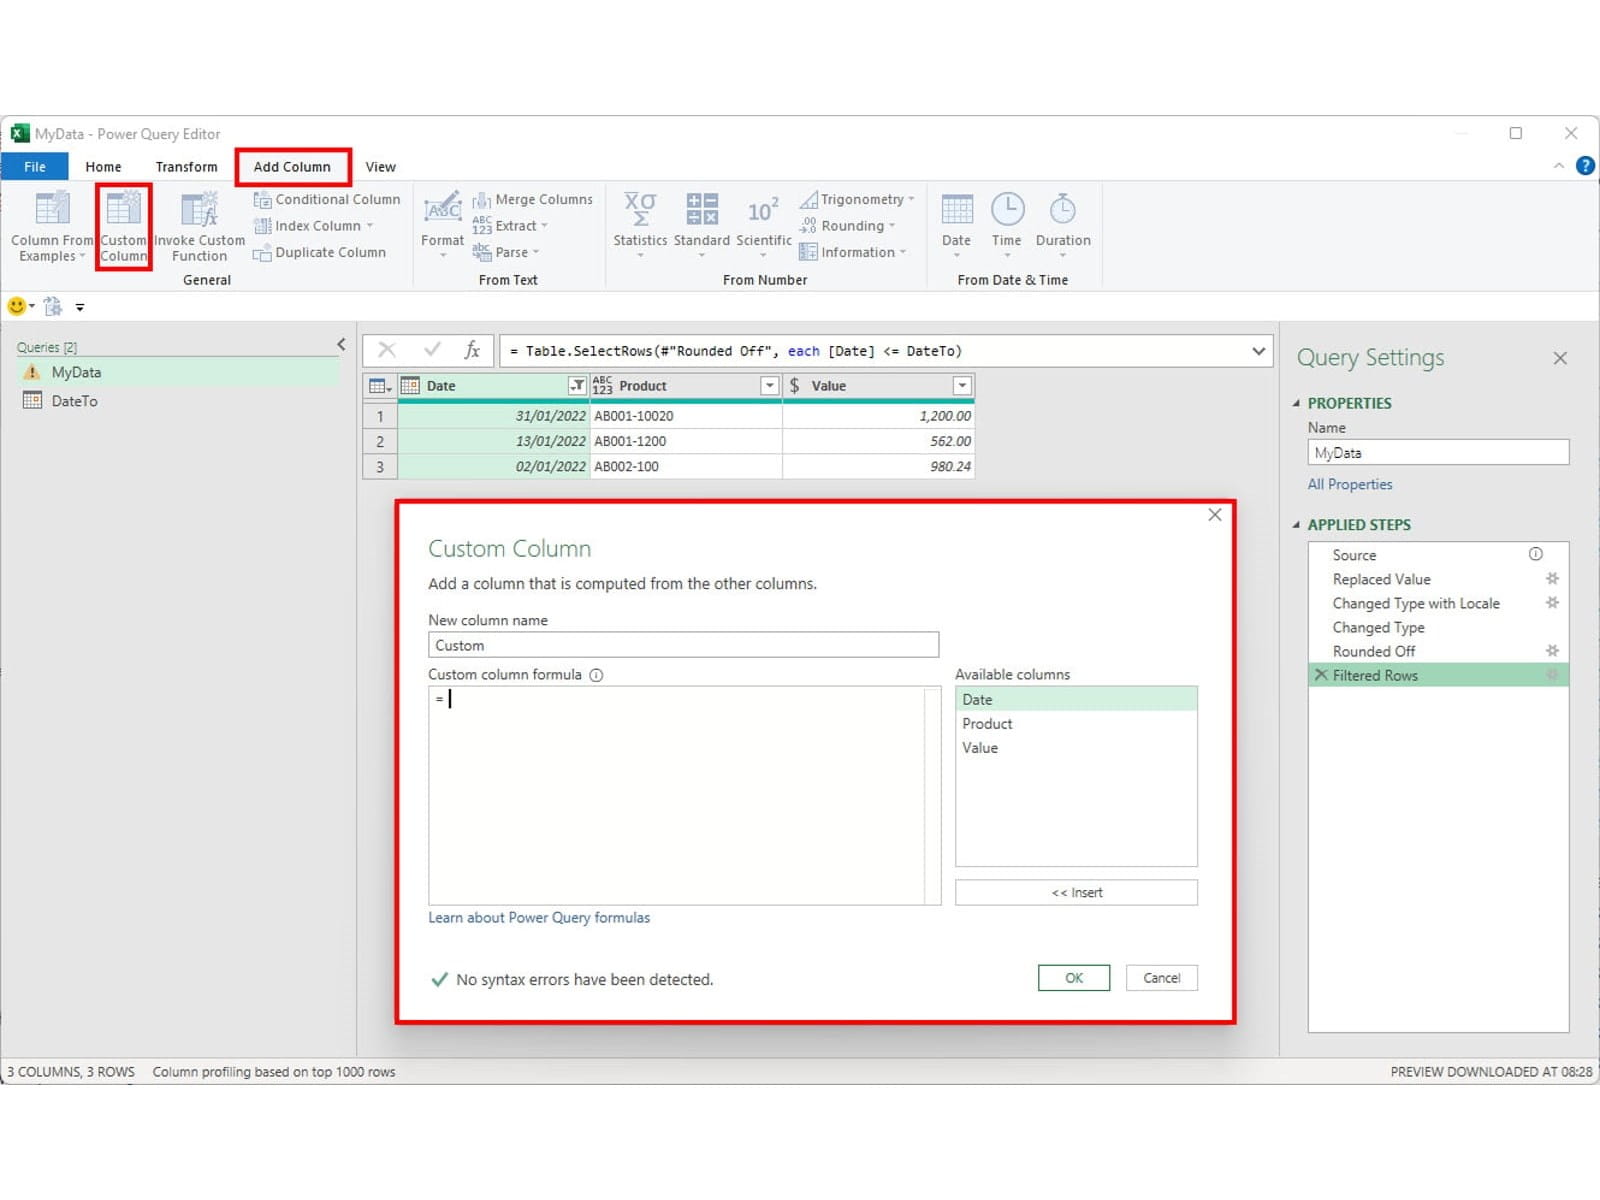
This is the Power Query equivalent of entering a formula in Excel, particularly if you think in terms of an Excel Table, where a formula will be copied down to all the other cells in the column. Another similarity with Excel is the ability to choose from a multitude of built-in functions to perform some sort of operation. As we saw last time, it’s important not to take the similarities with Excel too far, one particularly important difference is that Power Query formulae are case sensitive and failure to use upper and lower case characters correctly will cause an error.
For our example, we want to create a column that will show when our product order is due to be delivered and we will assume that this will be 15 days after the date in our Date column. So, we want to add 15 days to our Date value. We will keep the example simple by just entering the number 15 but ideally, we would use the technique that we covered last time to read the value in from an Excel cell, to make our value more visible and easier for users to change.
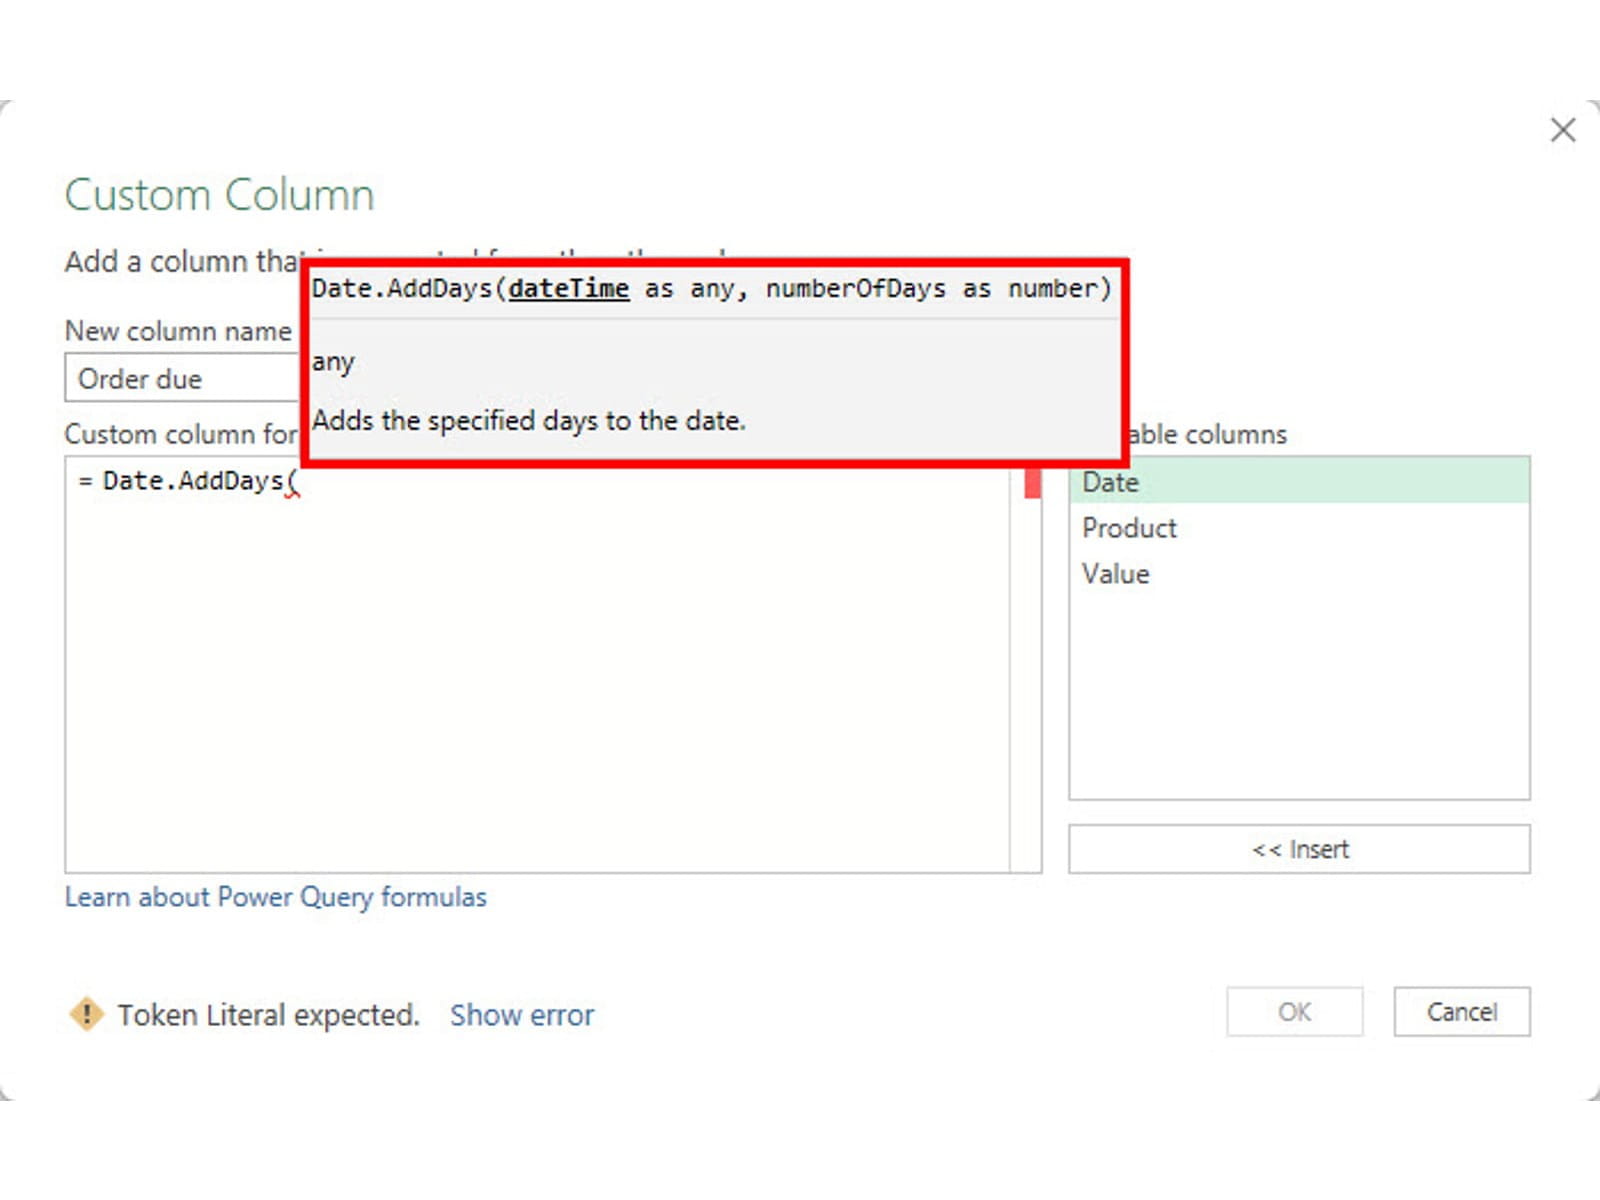
Initially, it doesn’t seem that there is much help available. Apart from ‘=’ we are presented with an empty text box and a rather broad ‘Learn about Power Query formulas’ link. However, just like typing in a function in an Excel cell, an AutoComplete list will appear when you start typing. Given that we want to work with a date, starting to type the word date seems a reasonable way to begin. Here, we have typed in a name for our new column and typed ‘da’:

We are prompted with a list of Power Query functions that start with ‘da’. Fortunately, enough, the first one is Date.AddDays which looks hopeful. We can click on this item in the list to choose it as the start of our formula. If we then type an opening bracket, again in a similar way to Excel, Power Query will display a guide to the syntax of our function, together with a brief description of what it does:
We need to enter two arguments: the date to start with and the number of days to add to that date. We want to use the date in the Date column of our table and, at the right-hand side of our dialog, an Available columns box lists the column headers. We can double-click on the Date entry in this box to add it to our formula using the correct syntax. We can then enter a comma to separate our two arguments and type in the value of 15 and our closing bracket:
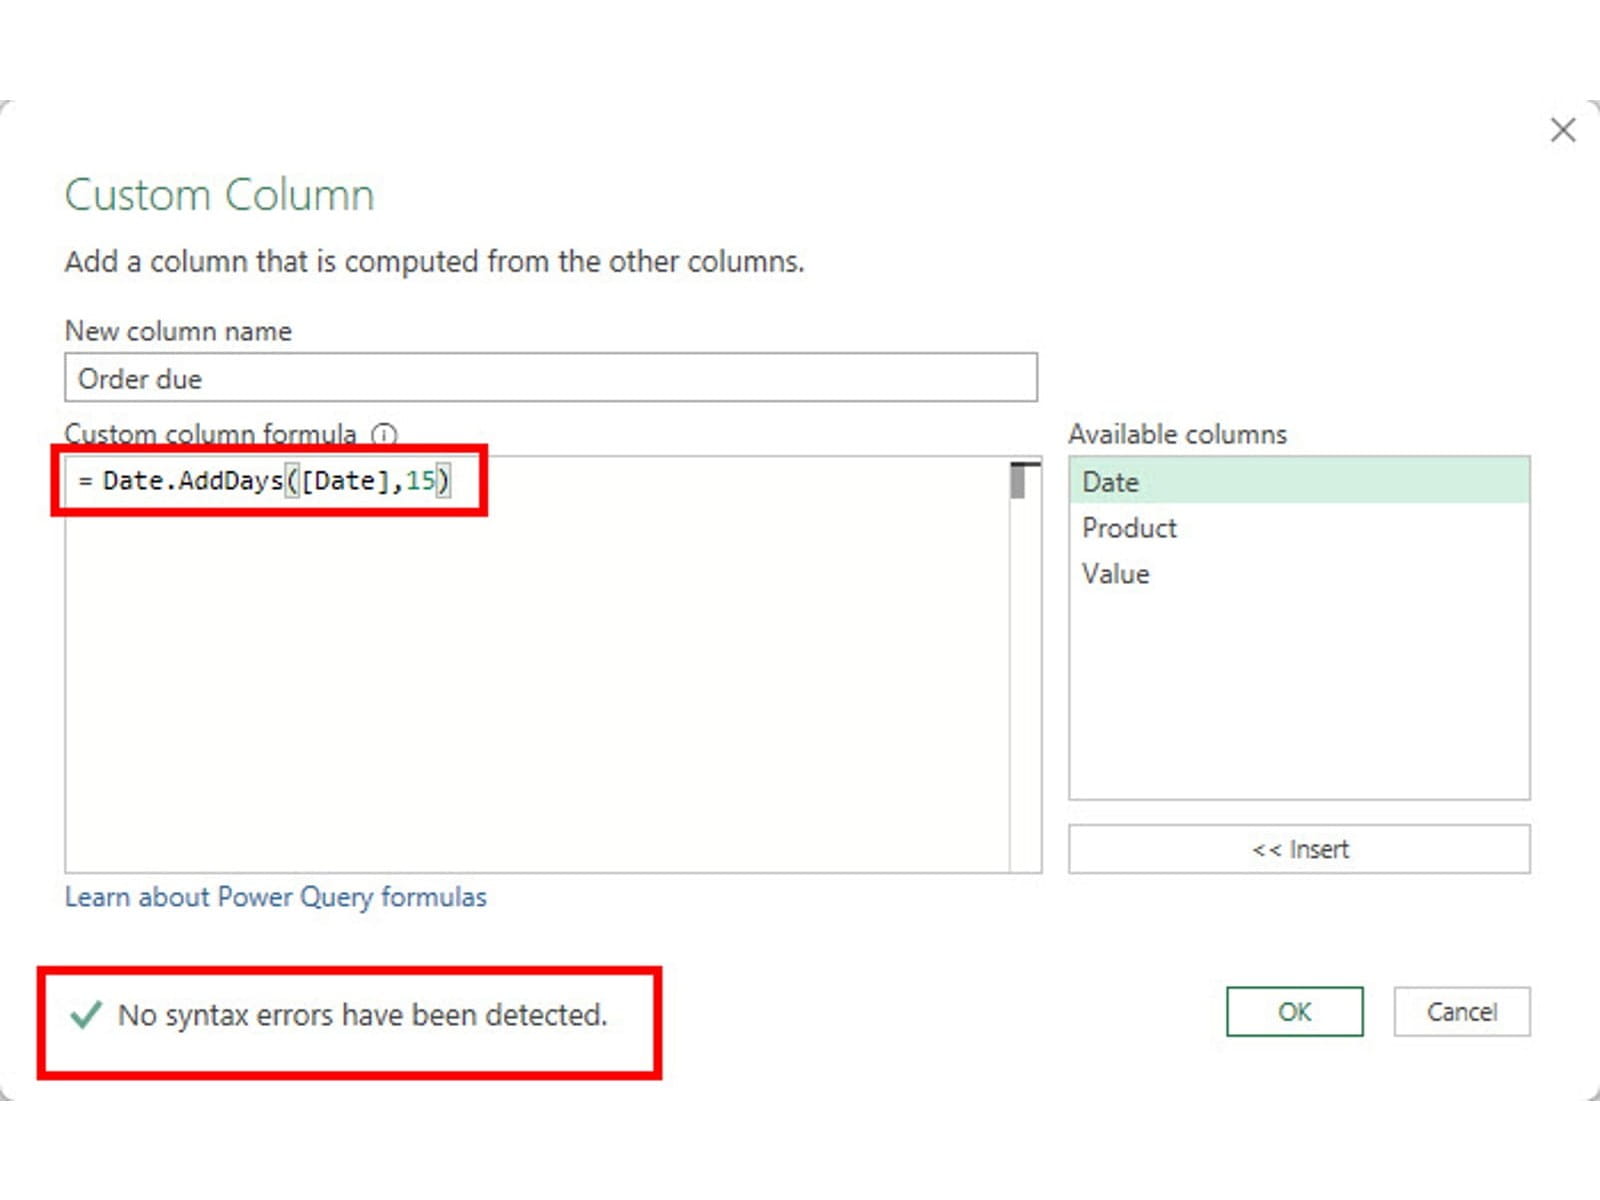
A check at the bottom of the dialog shows that ‘No syntax errors have been detected’. Clicking the OK button accepts our formula and creates our new column for us:
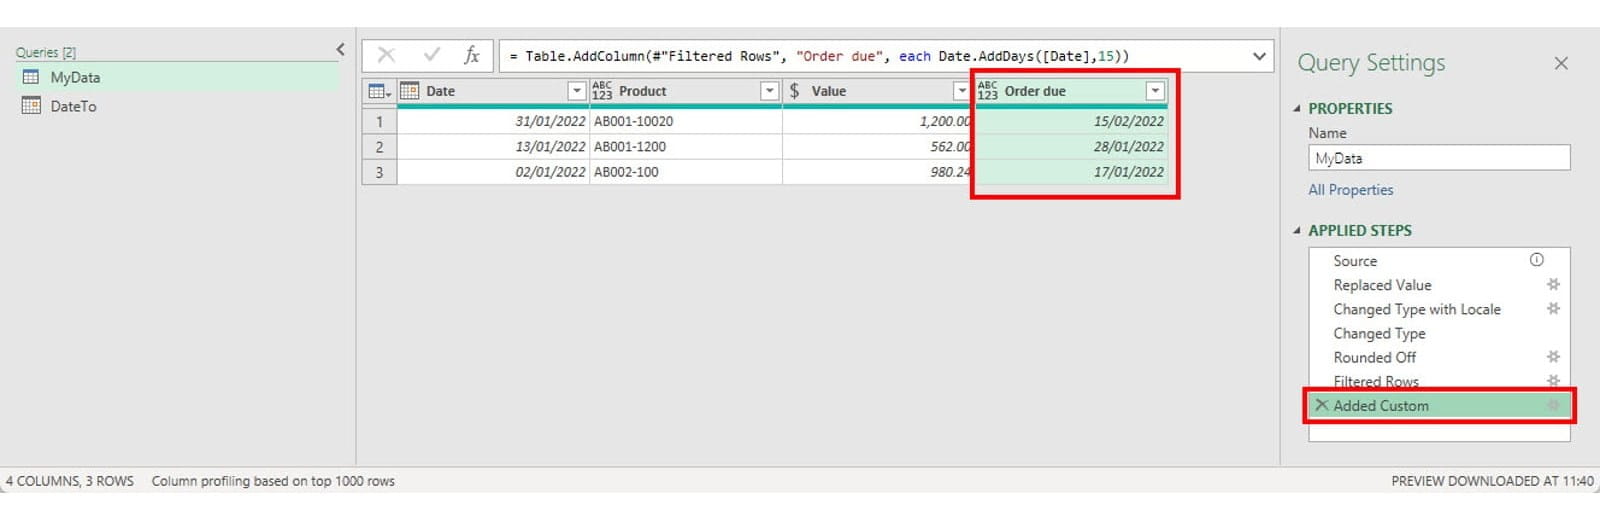
If we look at the formula that has been created in the Formula Bar, we can see the function that we typed in and the column name that we entered:
= Table.AddColumn(#"Filtered Rows", "Order due", each Date.AddDays([Date],15))
The Power Query editor has taken these elements and wrapped them in the Table.AddColumn() function for us. This function takes three arguments. The first is the Table to which the column is to be added. In this case that Table is the one created by the previous ‘Filtered Rows’ step. The second argument is the name to be used for our new column, and the third is the expression to be used to calculate ‘each’ row of the column.
As we again saw last time, as well as being able to edit our resulting formula in the Formula Bar directly, clicking the ‘gear’ icon displayed to the right of certain steps will open the dialog that was originally used to create the step, in this case the Custom Column dialog with the formula displayed.
Conclusion
Hopefully, this has shown that extending the capabilities of Power Query by using some of the many built-in functions is no more difficult than entering a function in an Excel cell, and that it also has the advantage of working with entire columns, avoiding the risk of any inconsistencies in the calculations within a column.
If you would like to see some of these Power Query techniques in action and see further uses of Power Query that can make a significant, practical difference to your working day, the Excel Community webinar on June 17th looks at how Power Query can help you avoid running out of dimensions when working with financial data:
Power Query - the Excel TARDIS (Totally Avoid Running out of Dimensions In Spreadsheets)
Archive and Knowledge Base
This archive of Excel Community content from the ION platform will allow you to read the content of the articles but the functionality on the pages is limited. The ION search box, tags and navigation buttons on the archived pages will not work. Pages will load more slowly than a live website. You may be able to follow links to other articles but if this does not work, please return to the archive search. You can also search our Knowledge Base for access to all articles, new and archived, organised by topic.
